


It's no secret that I love creating fun and beautiful spaces for little ones! Using some easily available and inexpensive materials (some that you might already have), you can create this Safari themed wall hanging. The best part? You an use this same set of steps to create a wall hanging to suit any theme! Instead of jungle animals, you could use farm animals, dogs, sea animals, even dinosaurs! You can make this wall hanging as big as you like, so it can be the main feature on a wall or just a fun decor accent.
To get started, you'll need to gather some supplies:

- wooden coat hanger (hook removed)
- string/ thin rope
- hollow plastic animals to suit your theme
- wooden beads
- scissors
- bodkin/thick needle
- removable wall hook
- tape/ruler
- drill and small drill bit (optional)
Drilling the holes is not necessary- you can easily tie your rope around the top timber instead by using a "Cow Hitch" knot. I had 4 animals to feature, so I found my two end points (1cm in from the end), and divided the space between by 3 to determine my 4 even points. You can also eyeball this!

I used a small drill bit to create 4 holes in the hanger.
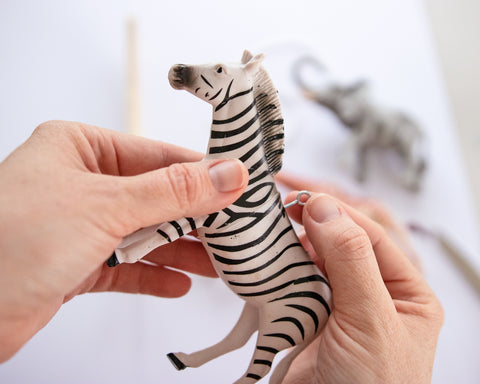
This next part is very important; make sure you find the centre balance point for your animals. If you don't do this, they will not sit level when hanging. The giraffe and elephant were a little front heavy, so I had to place the eye screws closer to their neck. I made a small hole first using the end of the screw, then easily wound them in tightly by hand.
Once you have placed all the eye screws into the animals, cut some lengths of rope. These will be doubled, so make sure you allow plenty of length. You can cut them shorter later!

Now to put it all together! That "Cow Hitch" I mentioned earlier? I used that knot to attach the rope to the animals. If you tied your rope to your hanger rather than drilling holes, these next few steps you will do in reverse!

Next, I laid all the pieces out so I could get an idea of where I wanted everything to be positioned. I marked the string above the hanger so I could tie it off later.

Using the bodkin, I threaded a couple of wooden beads above each animal, before inserting the rope through the hole on the hanger.

After I was happy with the positioning of each animal, I tied a big knot in the top of each rope so it wouldn't come back through the hole, and trimmed the ends.


